Smitefire logo

Join the leading SMITE community.
Create and share God Guides and Builds.

Create an MFN Account


Or

Vote received! Would you like to let the author know their guide helped you and leave them a message?

Banner for Anubis guides

Definitive Anubis Conquest Mid Lane Guide

14 4 34,152
8.2
by Kriega1 updated March 2, 2024

Smite God: Anubis

Build Guide Discussion 7 More Guides
Tap Mouse over an item or ability icon for detailed info

Anubis Build

Start for Sacrificial Build

Build Item Vampiric Shroud Vampiric Shroud
Build Item Lost Artifact Lost Artifact
Build Item Healing Potion Healing Potion
2
Build Item Multi Potion Multi Potion
2

Sacrificial Ability Build

Notes If Anti-Heal is needed, swap out Chronos' Pendant or Spear of Desolation for Divine Ruin.

Typhon's Fang should be core for any Anubis build.

Soul Reaver could be swapped out for an alternative damage item into less tankier/less HP heavy enemy comps.

Notes

If Anti-Heal is needed, swap out Chronos' Pendant or Spear of Desolation for Divine Ruin.

Typhon's Fang should be core for any Anubis build.

Soul Reaver could be swapped out for an alternative damage item into less tankier/less HP heavy enemy comps.

Build Item Sacrificial Shroud Sacrificial Shroud
Build Item Chronos' Pendant Chronos' Pendant
Build Item Spear of Desolation Spear of Desolation
Build Item Typhon's Fang Typhon's Fang
Build Item Calamitous Rod of Tahuti Calamitous Rod of Tahuti
Build Item Soul Reaver Soul Reaver

Sacrificial Ability Build (Rejuvenating variant)

Build Item Sacrificial Shroud Sacrificial Shroud
Build Item Bancroft's Claw Bancroft's Claw
Build Item Spear of Desolation Spear of Desolation
Build Item Typhon's Fang Typhon's Fang
Build Item Calamitous Rod of Tahuti Calamitous Rod of Tahuti
Build Item Rejuvenating Heart Rejuvenating Heart

Start for Timeline Build

Build Item Sands of Time Sands of Time
Build Item Tiny Trinket Tiny Trinket
Build Item Healing Potion Healing Potion
2
Build Item Multi Potion Multi Potion
2

Timeline Ability Build

Notes Swap Book of Thoth for Divine Ruin if anti-heal is needed.

Can swap Rod of Tahuti for Warlock's Staff (get after Book of Thoth).

Notes

Swap Book of Thoth for Divine Ruin if anti-heal is needed.

Can swap Rod of Tahuti for Warlock's Staff (get after Book of Thoth).

Build Item The Alternate Timeline The Alternate Timeline
Build Item Bancroft's Claw Bancroft's Claw
Build Item Book of Thoth Book of Thoth
Build Item Typhon's Fang Typhon's Fang
Build Item Calamitous Rod of Tahuti Calamitous Rod of Tahuti
Build Item Soul Reaver Soul Reaver

Relics and Shard

Notes Replace Horn Shard at level 12 for Aegis Amulet.

Upgrade relics to their upgraded versions once you're full build. Temporal Beads especially is the more important relic upgrade to prioritise.

Notes

Replace Horn Shard at level 12 for Aegis Amulet.

Upgrade relics to their upgraded versions once you're full build. Temporal Beads especially is the more important relic upgrade to prioritise.

Build Item Temporal Beads Temporal Beads
Build Item Aegis of Acceleration Aegis of Acceleration
Build Item Horn Shard Horn Shard

Alternative Items

Notes Divine Ruin - Standard Anti-Heal option, can still be bought for the on-hit passive and for more squishy focused burst if desired.

Perfected Rod of Tahuti - Alternative glyph choice for Rod of Tahuti if you wish to gain a small extra source of cooldown, but not generally as good as Calamitous Rod of Tahuti on Anubis.

Pendulum of Ages - Has a good early starter but the upgrade generally is less useful for Anubis compared to Sacrificial Shroud.

Gem of Focus - Strong early starter, and provides a good upgrade especially paired with Soul Reaver, but again is not as strong generally as Sacrificial Shroud for Anubis.

Obsidian Shard / Charon's Coin - Alternative % pen option to Rod of Tahuti.

Blink Rune (and upgrades) - Alternative aggressive relic to Aegis Amulet.

Notes

Divine Ruin - Standard Anti-Heal option, can still be bought for the on-hit passive and for more squishy focused burst if desired.

Perfected Rod of Tahuti - Alternative glyph choice for Rod of Tahuti if you wish to gain a small extra source of cooldown, but not generally as good as Calamitous Rod of Tahuti on Anubis.

Pendulum of Ages - Has a good early starter but the upgrade generally is less useful for Anubis compared to Sacrificial Shroud.

Gem of Focus - Strong early starter, and provides a good upgrade especially paired with Soul Reaver, but again is not as strong generally as Sacrificial Shroud for Anubis.

Obsidian Shard / Charon's Coin - Alternative % pen option to Rod of Tahuti.

Blink Rune (and upgrades) - Alternative aggressive relic to Aegis Amulet.

Build Item Divine Ruin Divine Ruin
Build Item Perfected Rod of Tahuti Perfected Rod of Tahuti
Build Item Pendulum of Ages Pendulum of Ages
Build Item Gem of Focus Gem of Focus
Build Item Obsidian Shard Obsidian Shard
Build Item Charon's Coin Charon's Coin
Build Item Blink Rune Blink Rune

Anubis's Skill Order

Plague of Locusts

1 X Y
Plague of Locusts
1 8 11 12 13

Mummify

2 A B
Mummify
4 15 16 18 19

Grasping Hands

3 B A
Grasping Hands
2 3 6 7 10

Death Gaze

4 Y X
Death Gaze
5 9 14 17 20
Plague of Locusts
1 8 11 12 13

Plague of Locusts

1 X
A plague of locusts bellows forth from Anubis' mouth, smothering all enemies in the area and doing damage every .25s for 3s. Anubis is immune to knockback while channeling and moves at 50% speed.

Ability Type: Cone, Damage
Damage Per Tick: 18 / 26 / 34 / 42 / 50 (+20% of your Magical Power)
Range: 35
Cost: 60 / 65 / 70 / 75 / 80
Cooldown: 11s
Mummify
4 15 16 18 19

Mummify

2 A
Anubis fires a bandage projectile, mummifying and stunning his target.

Ability Type: Line, Stun
Stun Duration: 1.6 / 1.7 / 1.8 / 1.9 / 2s
Range: 70
Cost: 60
Cooldown: 16 / 15 / 14 / 13 / 12s
Grasping Hands
2 3 6 7 10

Grasping Hands

3 B
Anubis calls for help from the underworld as hands penetrate the ground and claw at his enemies, doing damage and slowing every 0.5s for 2s.

Ability Type: Circle, Slow, Damage
Damage Per Tick: 25 / 40 / 55 / 70 / 85 (+35% of your Magical Power)
Slow: 25%
Range/Radius: 55/20
Cost: 60 / 65 / 70 / 75 / 80
Cooldown: 14 / 13 / 12 / 11 / 10s
Death Gaze
5 9 14 17 20

Death Gaze

4 Y
Anubis focuses all of his energy into a piercing gaze, doing damage to all enemies in the path, every 0.1s for 3s.

Ability Type: Line, Damage
Damage Per Tick: 23 / 28 / 33 / 38 / 43 (+15% of your Magical Power)
Range: 70
Cost: 90
Cooldown: 90 / 85 / 80 / 75 / 70s

Intro

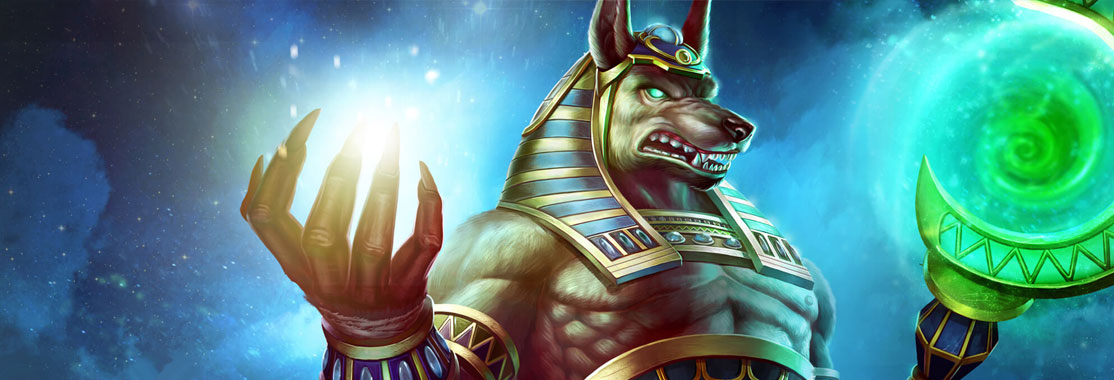
Hi, this guide is brought to you by Kriega1, I started playing Smite on PS4 in 2016 around Erlang Shen's release in Season 3, and eventually long term migrated to PC Smite around mid Season 7. I have peaked GM/Masters on PS4 and Masters in Ranked Conquest on PC. I also am a Mentor on the Official Smite Discord where I focus on general building for each role. I hope you find this guide as a useful learning resource for playing Anubis in the Mid lane.

Abilities

Anubis' Abilities


Passive - Sorrow

This passive is one of the main reasons you itemise into some lifesteal (especially Typhon's Fang) as Anubis, outside of his high base damage and very high scaling working well with Sacrificial Shroud.

At max stacks it grants 21 Protections (of each type) and 60% bonus lifesteal healing.


Ability 1 - Plague of Locusts

Anubis's main early wave clear, before Grasping Hands is levelled up and in scenarios where he is safe to walk up to clear. Can also be used (if timed correctly) for self peel purposes into enemies trying to use Knockup CCs or trying to displace you with a Knockback (e.g. Tyr).


Ability 2 - Mummify

A setup / self peel stun ability. Best used to guarantee landing Anubis' first 2 damaging abilities in his full kit rotation or to simply just make it easier to poke with his Grasping Hands to keep targets inside it.


Ability 3 - Grasping Hands

Anubis' main ranged poke / zoning ability (that normally requires his Mummify stun for setup due to the delayed cast time) but also his least damaging ability, best to use before either Plague of Locusts or Death Gaze, especially to fully stack his passive to maximise dps on the subsequent damaging ability (also unlike his 1 or 4 it is not channelled / doesen't lock you in animation for long).


Ultimate - Death Gaze
Anubis' highest damaging ability and one that puts his objective shredding potential above many other mages. Can go through walls.


Example Combos:

Main Combos:

Mummify > Grasping Hands > Death Gaze > Plague of Locusts

Mummify > Grasping Hands > Plague of Locusts > Death Gaze (Saving ult till last to finish off enemies at range)

Mummify > Grasping Hands > Plague of Locusts (Assuming ult not available)

(In some situations you can consider casting Grasping Hands and then Mummify to maximise the DPS from Grasping Hands, but generally you're going to rely on Mummify as setup for your burst).

Poking:

Mummify > Grasping Hands

How to Play

Gameplay Start / Early Game:
  • Start at the Fire Giant side Speed/Red buff. When it spawns, hit it with an auto attack to leash/aggro the camp and pull it towards the intersection (towards mid lane) between the Speed and Red buff camps, at the same time your Jungler will have leashed the Red/Speed buff towards the intersection.

  • As the 2 camps position together use Plague of Locusts to clear the camps. Make sure to pickup the Red buff once it has dropped. After these camps are cleared you will be level 2.

  • Now quickly make your way to the Gold Fury side Speed buff, if your jungler has not reached it yet (they should be) then leash the camp yourself towards the mid lane while you use Grasping Hands to clear the camp. Avoid pulling the camp into tower range if possible. After this you will immediately head to lane while your jungler will typically clear the xp camp to the side of the green buff.

  • From here you will usually meet the enemy mid in lane on the first wave. Depending on yours and their early pressure/clear and positioning you will decide whether you'll be able to fight or not and whether you'll be able to use Grasping Hands on the whole wave or just be able to hit the front melee minions.
  • How it goes from here will determine: if it's just a stalemate, you or your jungler has kill potential, if you will have mid camp pressure or if you'll have to back towards your tower line and safe clear.

  • From here you'll mainly be looking to clear waves, contest mid camps, clear the damage buff, assist support with health buff clear (once they rotate over from duo), and being aware of rotation opportunities.

  • In some cases you may be able to steal enemy side jungle farm but it is risky and not that generally beneficial for direct farm compared to your own side's farm and controlling neutral farm, but can be useful to put the enemy further behind.


Mid Game:
  • As the match goes towards the mid game, other than the usual farm opportunities you'll be looking to control the Stygian Beacon for your team and try attempt, contest and steal (if the enemy is attempting to kill them) the Gold Fury and Pyromancer objectives.

  • When the Beacon spawns often both teams will try rotate over to control it, especially the mid, support and jungle. In 1vs1 cases you'll have to decide whether you or the other enemy has more kill potential and who is more likely to have their teammates to rotate over first to impact your decision if contesting the beacon will be worth it.

  • As for Gold Fury and Pyromancer opportunities they will vary on factors such as: your team's overall objective shred, your ADC's current objective shred / build, your team's map pressure, how strong each team's teamfight is, where on the map everyone is (i.e. if one team is doing Gold, the other may decide to do Pyro as a smaller trade), if any members of the enemy team are on a respawn timer, etc...


Late Game:
  • At this stage you'll mainly be looking at wave pushing, contesting Fire Giant, and Phoenix sieging / Phoenix defense, though Pyromancer and Gold Fury (especially Oni variant) will still be somewhat relevant but less important.

  • As for late game teamfights, most often you will be positioned in the "backline" (behind your team's solo and support - who generally are the "frontline") and will play around your ADC to deal with the enemy frontline and jungler, while making sure to put out as much damage as possible to the highest threats on the enemy team.

  • When it comes to Fire Giant opportunities, often there can be stalemates where both teams will try to force a teamfight or look for lone picks in order to gain an advantage, sometimes involving one team going for a non fully committing attempt at doing the objective to bait the other team to step up.

Warding

Mid Warding:

Here are your regular warding spots for mid, to help your team be aware of the enemy team's general rotations especially when you're not in mid lane. Generally with good map awareness you shouldn't need to rely on wards much yourself for safety.


  • Green: Placing wards at these locations on both sides of the lane give you good general vision of the nearby jungle, giving vision of the entrances to your lane so you can see incoming ganks.

  • Purple: You can place a ward directly in front of the enemy tower (but not within its range), which can give you a lot of information if you keep an eye on the mini-map. If they are sitting on the ward in mid, you know where they are. If their icons push further into the lane, you can assume they are pushing. If they go towards the right or left jungles you can make early calls on "Be Carefuls" or "Enemy Incoming" or you can assume they are doing their buff camps. If their icons move backwards towards their tower you can generally assume that they are going to one of the back pathways into the jungle, likely to clear camps.


Late-Game Warding:

Over here is shown the ideal lategame warding spots around Fire Giant, though often you will be sharing the responsibility for this rather than handling it alone, especially when it's not safe for you to step up to place deeper wards. Any wards placed closer to the objective within the Fire Giant pit tend to get destroyed by Sentries more often than not, so they tend to not be reliable.

Remember, minions act as moving wards in the lanes, and are able to spot nearby gods. If your towers are down, keep your minions pushed up as much as possible to provide an extra set of eyes.


  • White Circles: These are all offensive locations that allow you to spot enemies near to or approaching objectives, and are helpful in covering multiple approaches. The closer you get to the Fire Giant, the more contested those spots will be and the more likely enemies will try to counter-ward.

    The ones closest to the enemy base can give you very early notice.

  • Red Circles: Fairly obvious, but it's always good to have vision on the main jungle objectives, especially the Fire Giant. Sentry Wards are key here, as they allow you to spot and remove enemy wards. You can place wards directly on top of the objectives, or put them slightly to one side to try to spot enemy wards or protect yours from being detected.
Counter-Warding: Enemies may drop wards on your defensive side in similar (opposite) spots to where you would place yours. If the Fire Giant is already covered and you have a spare Sentry Ward, place them in these spots to limit the enemy's vision on your team.

Defensive Warding: If you're pushed back to your phoenixes or inside your base, locate your wards in the nearby jungle and general approaches.

Leave a Comment

You need to log in before commenting.

Collapse All Comments

1
gavinjgrande (1) | January 22, 2024 7:33am
Love the build. Big fan of yours 🙌🏾
1
JuaniT033 | January 1, 2024 10:31am
Spear of the magus died ?? because it was op before
1
Kriega1 (143) | January 1, 2024 10:32am
Passive is much weaker than it used to be and there's better items for percent pen / power. If it had flat pen it could at least be an ok early game item / alt to Bancroft's/Deso but it doesen't. Last time Magus was op on Anubis was when it had the flat shred reduction that could remove up to 50 or so prots.
1
DV-8 (35) | October 9, 2023 11:29am
Could also add Obsidian Shard and Pythagorem's Piece as alternative items.
1
Kriega1 (143) | October 9, 2023 12:22pm
Don't really think Pythag's is too good in Mid. Mage power nerfs didn't do well for the item plus it no longer has percent pen. Shard im not sure about because in generally sure Rod is a better option.
1
DV-8 (35) | October 9, 2023 5:02pm
That's fair.

I think most of the appeal for Pythag's is in the early sustain it provides while still having decent stats (comparable to Chronos' Pendant), and at a cheap price point.

And while I do definitely like Tahuti, I believe Shard does more against tanks. You'll usually want to time the passive to apply to your ult, which when combined with Tyhons is going to absolutely shred enemies by 60% plus whatever flat pen you may have.
Load more comments (1 more replies) →
Loading Comments...
Load More Comments
League of Legends Build Guide Author Kriega1
Definitive Anubis Conquest Mid Lane Guide
Table of Contents

SMITEFire is the place to find the perfect build guide to take your game to the next level. Learn how to play a new god, or fine tune your favorite SMITE gods’s build and strategy.

Copyright © 2019 SMITEFire | All Rights Reserved