
Vote received! Would you like to let the author know their guide helped you and leave them a message?

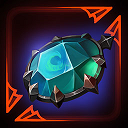
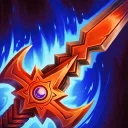
![]() Bluestone Pendant is an essential item for skill based damage ADCs, provides you power, mana sustain and hp sustain.
Bluestone Pendant is an essential item for skill based damage ADCs, provides you power, mana sustain and hp sustain.
![]() Morningstar will evolve into
Morningstar will evolve into ![]() Transcendence.
Transcendence.
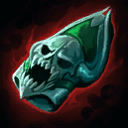
![]() Golden Shard it is always the best choice because will provide you of
Golden Shard it is always the best choice because will provide you of ![]() Golden Gooseberries passive so you will have a really good early push!
Golden Gooseberries passive so you will have a really good early push!
 Bluestone Pendant
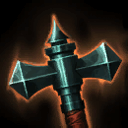
 Morningstar
 Healing Potion
 Multi Potion
 Golden Shard
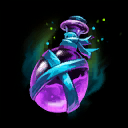
 Purification Beads
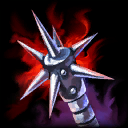
![]() Bluestone Brooch gives you a lot of power and stacks damage with your main push and damage skill
Bluestone Brooch gives you a lot of power and stacks damage with your main push and damage skill ![]() Suppress The Insolent.
Suppress The Insolent.
![]() Transcendence always build this item with skill based ADCs, it gives you power, CD and infinite mana sustain.
Transcendence always build this item with skill based ADCs, it gives you power, CD and infinite mana sustain.
![]() Soul Eater fits perfectly with skill damage gods because you will lifesteal when using skills.
Soul Eater fits perfectly with skill damage gods because you will lifesteal when using skills.
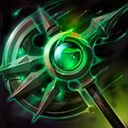
![]() The Crusher is essential because when you are using any of your skills, the passive will give you an extra 30% damage to enemies/minions.
The Crusher is essential because when you are using any of your skills, the passive will give you an extra 30% damage to enemies/minions.
![]() Fail-Not provides you with CD, crit chance, power and penetration, the perfect item for any ADC.
Fail-Not provides you with CD, crit chance, power and penetration, the perfect item for any ADC.
![]() Heartseeker gives you penetration, good power, mana that will increase your power thanks to the
Heartseeker gives you penetration, good power, mana that will increase your power thanks to the ![]() Transcendence passive.
Transcendence passive.
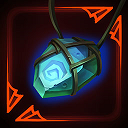
![]() Temporal Beads provides you with immunity to cc and cooldown reduction.
Temporal Beads provides you with immunity to cc and cooldown reduction.
![]() Aegis of Acceleration provides you with immunity to damage that will help you peeling yourself and avoid enemies' ultimate skills or big damages.
Aegis of Acceleration provides you with immunity to damage that will help you peeling yourself and avoid enemies' ultimate skills or big damages.
 Bluestone Brooch
 Transcendence
 Soul Eater
 Fail-Not
 The Crusher
 Heartseeker
 Aegis of Acceleration
 Temporal Beads
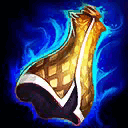
![]() Leather Cowl is one of the best starters for fighting and sustaining in lane, providing you with movement speed when you are alone, lifesteal, attack speed and power.
Leather Cowl is one of the best starters for fighting and sustaining in lane, providing you with movement speed when you are alone, lifesteal, attack speed and power.
![]() Spiked Gauntlet will evolve into
Spiked Gauntlet will evolve into ![]() Devourer's Gauntlet.
Devourer's Gauntlet.
![]() Golden Shard it is always the best choice because will provide you of
Golden Shard it is always the best choice because will provide you of ![]() Golden Gooseberries passive so you will have a really good early push!
Golden Gooseberries passive so you will have a really good early push!
 Leather Cowl
 Spiked Gauntlet
Healing Potion
Multi Potion
Golden Shard
Purification Beads
Spiked Gauntlet
Healing Potion
Multi Potion
Golden Shard
Purification Beads
![]() Leader's Cowl is insane for team fights in late game because it gives you attack speed in area for your teammates and will provide you with lifesteal (sustain), 250 health that can make a difference between surviving or not, good amount of power and an incredible attack speed stat.
Leader's Cowl is insane for team fights in late game because it gives you attack speed in area for your teammates and will provide you with lifesteal (sustain), 250 health that can make a difference between surviving or not, good amount of power and an incredible attack speed stat.
![]() Devourer's Gauntlet is essential on an basic attack damage build because it gives you flat penetration, power and lifesteal (you always need sustain as a hunter).
Devourer's Gauntlet is essential on an basic attack damage build because it gives you flat penetration, power and lifesteal (you always need sustain as a hunter).
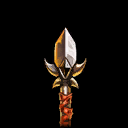
![]() The Ferocious Executioner is a cheap item that enables you to decrease enemies' protections when you hit them with an auto attack and good attack speed stats. Before selling the recipe you should always look to upgrade this item into the glyph because of the strong passive that it has for killing tanks and solo laners.
The Ferocious Executioner is a cheap item that enables you to decrease enemies' protections when you hit them with an auto attack and good attack speed stats. Before selling the recipe you should always look to upgrade this item into the glyph because of the strong passive that it has for killing tanks and solo laners.
![]() Dominance provides you with the essential stats that a hunter needs: attack speed, power, mana sustain and an incredible penetration percentage on basic attacks.
Dominance provides you with the essential stats that a hunter needs: attack speed, power, mana sustain and an incredible penetration percentage on basic attacks.
![]() Qin's Sais you should always buy this item because of its passive, it is really strong for killing supports and solo laners (tanky gods).
Qin's Sais you should always buy this item because of its passive, it is really strong for killing supports and solo laners (tanky gods).
![]() Fail-Not provides you with multiple insane stats like critical chance, penetration, CD and power. It is also good because having some critical chance will be essential for late game fights and more important, doing more DPS to objectives like Fire Gigant, Gold Fury or Pyromancer.
Fail-Not provides you with multiple insane stats like critical chance, penetration, CD and power. It is also good because having some critical chance will be essential for late game fights and more important, doing more DPS to objectives like Fire Gigant, Gold Fury or Pyromancer.
![]() Temporal Beads provides you with immunity to CC and cooldown reduction.
Temporal Beads provides you with immunity to CC and cooldown reduction.
![]() Aegis of Acceleration provides you with immunity to damage that will help you peeling yourself and avoid enemies' ultimate skills or big damages.
Aegis of Acceleration provides you with immunity to damage that will help you peeling yourself and avoid enemies' ultimate skills or big damages.
This build is meant for competitive because your enemies are supposed to be in communication and playing smart so you will be in most of the cases only hitting tanks or junglers that are trying to kill you. Most of them will have more than 200 hundred physical and magical protections and more than 3000 HP so you will need to have bought penetration items for being able to kill them as quick as possible.
 Leader's Cowl
 Devourer's Gauntlet
 Dominance
 Demon Blade
 Envenomed Executioner
 Devoted Deathbringer
Temporal Beads
Aegis of Acceleration
Devoted Deathbringer
Temporal Beads
Aegis of Acceleration
![]() Mantle of Discord is a defensive item with cc immunity, and a really good choice against full engage set ups. You should build it instead of
Mantle of Discord is a defensive item with cc immunity, and a really good choice against full engage set ups. You should build it instead of ![]() Fail-Not if you go for it.
Fail-Not if you go for it.
![]() Titan's Bane If you are losing hardly the game and you don't have enough gold, go for this item instead of
Titan's Bane If you are losing hardly the game and you don't have enough gold, go for this item instead of ![]() Heartseeker. Will give you much penetration for a low cost compared to
Heartseeker. Will give you much penetration for a low cost compared to ![]() Heartseeker.
Heartseeker.
 Mantle of Discord
 Titan's Bane
 Brawler's Beat Stick
 Qin's Sais
Fail-Not
Qin's Sais
Fail-Not
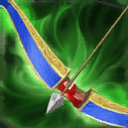
 Silverbranch Bow
 Fortifying Shell
 Y
Y
 B
B
 A
A
 X
X

Tap each threat level to view Artemis’s threats
Tap each synergy level to view Artemis’s synergies
Hey, this guide is brought to you by TottiGR! I started playing Smite on PC in February 2014. I have been playing competitive since 2016 and I have been a professional Smite player between March 2020 to July 2023. I have played in different teams like JustF6, Gilded Gladiators or Tartarus Titans this last year. I have peaked 3500 MMR GM/Masters in Ranked Conquest on PC every season since 2017. I also made Smite Masters (LAN) 4 times in 2022 so I really think I have the knowledge about guiding about the ADC role. I hope you find this guide as a useful learning resource for playing ![]() Artemis as an ADC.
Artemis as an ADC.
Here are my socials:
|
Passive -
To show you in a simply way, Overall, it is a great passive ability to have, but is purely situational when it comes down to it. (not going to help if there isn't much CC) |
|
Ability 1 -
This ability matches well with It has tick damage after the initial damage. |
|
Ability 2 -
|
|
Ability 3 -
This is her go to damage dealing ability paired with |
|
Ultimate -
|
SMITEFire is the place to find the perfect build guide to take your game to the next level. Learn how to play a new god, or fine tune your favorite SMITE gods’s build and strategy.
Copyright © 2019 SMITEFire | All Rights Reserved


Sorry King Zeb but I do not understand what are you trying to say! Bluestone build still works!
Hey Kriega :D,
I don't think it's a good choice transitioning
If you want to go AA you should always buy Devourer Gauntlet build because this item provides you of more power, flat pen and lifesteal so you won't have to buy other lifesteal item to sustain in lane and just go for a penetration attack speed item like
With the build i posted you will reach 30% couldown reduction so your skills timers will be low in case your missing many of them there won't be much problem.
Last thing is that your strong point in late game is your ultimate, you will need to be smart and try to know when to use it to avoid failure so. In my opinion it is really difficult to miss and will deal much more damage to enemy carries compared to the AA build.
In general this is why I think all of SPL players are doing this skill power based build instead of the AA on this god.
I hope this clears your doubts :P!
I think it is the most powerful build right now for Artemis. In Smite Pro League are playing this build because you have a lot of early pressure and chance of having early kills compared to an attack speed build where you won't have any push or damage during the early game.
With
Hope this helps you!
Just curious,
Just curious,
Good night Bran,
In this build you are looking to focus in skills damage in late game so I think the
I don't think going