Smitefire logo

Join the leading SMITE community.
Create and share God Guides and Builds.

Create an MFN Account


Or

Vote received! Would you like to let the author know their guide helped you and leave them a message?

Banner for Pele guides

Grandmaster Pele Jungle

36 4 53,856
8.5
by AutoSpeed updated April 21, 2024

Smite God: Pele

Build Guide Discussion 0 More Guides
Stream is Offline
Tap Mouse over an item or ability icon for detailed info

Pele Build

Starting Items

Notes It's rare you need beads to start, it also hurts your game a lot so I highly recommend going Blink first relic.

Remember with Eye Of The Jungle to be inside the Jungle for mana regeneration, don't overuse mana in the early game mid 2v2.

Notes

It's rare you need beads to start, it also hurts your game a lot so I highly recommend going Blink first relic.

Remember with Eye Of The Jungle to be inside the Jungle for mana regeneration, don't overuse mana in the early game mid 2v2.

Build Item Eye Of The Jungle Eye Of The Jungle
Build Item Spiked Gauntlet Spiked Gauntlet
Build Item Healing Potion Healing Potion
3
Build Item Blink Rune Blink Rune
Build Item Golden Shard Golden Shard

Full Build

Notes High damage and survivability.
It's rare you don't find antiheal value from Brawler's Beat Stick, but the power bonus it gives you makes it worth building either way.

Notes

High damage and survivability.
It's rare you don't find antiheal value from Brawler's Beat Stick, but the power bonus it gives you makes it worth building either way.

Build Item Seer Of The Jungle Seer Of The Jungle
Build Item Soul Eater Soul Eater
Build Item Jotunn's Vigor Jotunn's Vigor
Build Item Serrated Edge Serrated Edge
Build Item Bloodforge Bloodforge
Build Item Mantle of Discord Mantle of Discord
Build Item Temporal Beads Temporal Beads
Build Item Scorching Blink Rune Scorching Blink Rune

Situational Items

Notes These items would be built 6th item.
Magi's Revenge is for CC heavy team comps.
Heartseeker would give us extra damage with our abilities, but we run the risk of being 1-shot

Notes

These items would be built 6th item.
Magi's Revenge is for CC heavy team comps.
Heartseeker would give us extra damage with our abilities, but we run the risk of being 1-shot

Build Item Spectral Armor Spectral Armor
Build Item Magi's Revenge Magi's Revenge

Pele's Skill Order

Pyroclast

1 X Y
Pyroclast
1 4 6 7 9

Eruption

2 A B
Eruption
2 8 11 12 14

Magma Rush

3 B A
Magma Rush
3 15 16 18 19

Volcanic Lightning

4 Y X
Volcanic Lightning
5 10 13 17 20
Pyroclast
1 4 6 7 9

Pyroclast

1 X
Pele flourishes and fires out a magma orb ahead of her in a line, dealing damage and granting fuel per enemy hit. Once the fiery projectile reaches maximum distance it hovers for a brief instant, solidifies, and then returns back in pieces, dealing damage to enemies on the way back. The number of shards returning is dependent on the rank of this ability.

Pele has 2 charges of this ability.

Ability Type: Line, Damage
Damage: 60 / 100 / 140 / 180 / 220 (+60% of your Physical Power)
Return Damage: 30 (+15% of your Physical Power)
Fuel Gain: 5
Range: 60
Cost: 40 / 45 / 50 / 55 / 60
Cooldown: 15s
Eruption
2 8 11 12 14

Eruption

2 A
Pele fiercely erupts energy into the ground, exploding in an area around her, causing damage and Knockup to all enemies.

At ranks 3 and 5 the area expands again at a delay, dealing less damage and a smaller Knockup.

Ability Type: Circle, Knockup, Damage
Inner Damage: 60 / 105 / 150 / 195 / 240 (+80% of your Physical Power)
Outer Damage: 130 / 170 / 210 (+60 of your Physical Power)
Radius: 15 / 25 / 35
Cost: 60 / 65 / 70 / 75 / 80
Cooldown: 15s
Magma Rush
3 15 16 18 19

Magma Rush

3 B
Pele churns the land around her, dealing damage to nearby enemies and providing constant movement speed while this ability is active.
Toggle this ability again to enter an amplified state, expending more fuel but dealing more damage and providing additional movement speed.
This ability has no cooldown but uses fuel and cannot be activated when below 10 fuel.
This damage does not trigger Item effects.

Ability Type: Circle, Buff, Damage
Damage: 10 / 15 / 20 / 25 / 30 (+5% of your Physical Power)
Speed: 30%
Amplified Damage: 20 / 35 / 50 / 65 / 80 (+20% of your Physical Power)
Amplified Speed: 60%
Initial Fuel Cost: 5
Cost: 10
Cooldown: 0s
Volcanic Lightning
5 10 13 17 20

Volcanic Lightning

4 Y
After a short warm up, Pele dashes forwards dealing massive damage and a slow to the first enemy God hit, and dealing additional damage to enemies behind in a cone.

For the next 10 seconds or 4 attacks, every time Pele hits an enemy with a basic attack, she instead deals ability damage in a cone originating from that enemy. During this time Pele's basic attacks deal 40% reduced damage.

Ability Type: Cone, Slow, Damage
Damage: 180 / 265 / 350 / 435 / 520 (+60% of your Physical Power)
Cone Damage: 100 / 140 / 180 / 220 / 260 (+50% of your Physical Power)
Slow: 20 / 25 / 30 / 35 / 40%
Slow Duration: 3s
Range: 60/35
Cost: 100
Cooldown: 90s

Pele Threats

Tap each threat level to view Pele’s threats

Max
2
Major
5
Even
9
Minor
6
Tiny
1

Pele Synergies

Tap each synergy level to view Pele’s synergies

Ideal
2
Strong
0
OK
0
Low
0
None
0

Introduction

Hey, my name is AutoSpeed and I have been a Grandmaster + 3500 (MMR cap) in Conquest, Joust, and Duel in every recent season. I'm happy to share my knowledge of the game with everyone, and I appreciate any and all feedback!

Here are my channels:

Pele Basics

Pele's Abilities


Passive - Everlasting Flame

Pele gains a considerable amount of power and lifesteal when she falls below 50% health.

Everlasting Flame is meant to support your all-in dive, and encourages you to commit to your target.


Ability 1 - Pyroclast

Pele throws out a straight-line projectile Pyroclast, which returns in pieces, dealing lesser damage on the way back. This ability has 2 charges.

Pyroclast is Pele's main damaging ability, and is used to clear camps and hit enemy gods on cooldown. Try to Auto Attack before each Pyroclast, because Pyroclast acts as an Auto Attack Reset, which will deal much greater damage.


Ability 2 - Eruption

Pele slams the ground, damaging and knocking up nearby enemies. The radius of the ability increases as you Level Up the ability.

Eruption is best used the second you are in range of the enemy, as it will allow you to burst the enemy without getting hit in return.


Ability 3 - Magma Rush

Pele summons a small pool of fire around herself which damages enemies and grants Pele movement speed.

Magma Rush can be activated again to double the effects, but the duration is reduced. Magma Rush can be cancelled at any time.

Magma Rush is used to get close to the enemy. You should use it's amplified version in every combat scenario, and use the normal version of it to move around the map without burning fuel.


Ultimate - Volcanic Lightning

Dashes forward dealing a massive burst attack, slowing and damaging any enemies behind in a cone. Pele's next few Auto Attacks are enhanced, dealing a large cone burst behind the enemy she strikes

Volcanic Lighting is Pele's finisher move, used to travel quickly and deal large damage. Use it to lockdown the enemy after they use their escape ability, or to immune a crowd control effect during a fight.


Ability Rotations:

Standard Attack:

Magma Rush > Eruption > Auto Attack > Pyroclast > Auto Attack > Pyroclast

Blink Chain:

Magma Rush > Blink > Eruption > Auto Attack > Pyroclast > Auto Attack > Pyroclast

Pele's ultimate Volcanic Lighting can be unleashed at any step, and is used to immune CC, burst, or to catch up to the enemy.

Jungle Tutorial

Early Game:
  • Star at the Fire Giant side Speed Buff (or Red Buff), and group up the jungle camps with your mid laner. Once the Red and Speed buff jungle camps are cleared together, head towards your remaining speed buff. Your mid laner should help you clear this buff camp. Finally, head towards the exp camp near the Tier 1 Mid tower, presume you will clear this alone.

  • You now have 2 choices. You can stay in the Jungle towards the mid lane, looking for a gank on the enemy mid laner or clear the Mid-Harpies. The second option is to head straight to duo lane, and look for a gank on the enemy duo lane (and clear Scorpion). Heading to Duo lane has a greater risk, but much greater reward if successful.

  • Pele is one of the more aggressive assassins in the early fights. While you won't have your gap closer ability Magma Rush at level 2, you do have blink which is quite deadly. The rule of thumb is: The enemy laner is usually the easier kill, but the enemy jungler is the one who might kill you (or your teamate)

  • Use Pyroclast to clear the minion wave and jungle camps, save a single charge of the ability in-case the enemy decides to fight.

  • Pele has powerful early fights, and is usually faster than the enemy jungler. For that reason, it is recommended you try to make rotations. Don't forget to farm during the process!

  • Use Magma Rush to travel around the map faster than the enemy jungler. Make sure to save fuel just before you reach the enemies so you can use Magma Rush during combat as well.

  • Your priorities are: Buff camps > Rotations > Harpies.

  • Buff camps spawn once every 3 minutes, so there is downtime in-between to decide if you wish to rotate on the enemy.

  • Once you unlock your first item, your damage is much stronger and this is considered your power spike. Keep in mind that the enemy jungler will also experience this, so do your best to know which side of the map the enemy jungler is on.

Mid Game:
  • Begins around ~14 minutes, or when most people have hit Level 12 and unlocked their Second Relic. Most enemy teams have gotten around to warding by now, and team fights become increasingly common. Most builds have started to show effectiveness.

  • Magma Rush is still used to rotate, but keep track of where the enemies are so you don't rush straight into one of their traps.

  • Keep the rotation of: Buff Camps > Rotations > Harpies , but recognize that you should prioritize objectives and team fights above all else. If a team fight is going on, skip your farm to help your team out. Only farm if the fight is already lost, or you are on the other side of the map.

  • While outrotating the enemy jungler may become difficult at this stage, recognize you can kill the enemy backliners through many escapes/ultimates/relics with proper use of Volcanic Lightning. Your want your teammates to help out to protect yourself from enemy counter rotations.

Late Game:
  • Almost everybody has hit Level 20, Fire Giant is the most important objective on the map. Starter items become unlocked at Level 20, which results in a damage/defensive spike. This means that everybody dies faster, and Team Fights are the most important thing.

  • Like many other junglers, you almost never want to be the initiator of a team fight. Wait for the fight to begin, and try to blink on the enemy backline (or fleeing enemies). The only time you should act first is when you catch an enemy who is alone and isolated from their team.

  • Try to fight near your solo laner, and play off of their initiation. It's important the two of you work together to prevent the enemy backline from having the numbers advantage.

  • Use your blink and beads aggressively whenever possible, loosing your beads before the fight happens is worst-case scenario because many times you will need it to secure a kill.

  • One very important late game warding tip is: Almost every single team fight at Fire Giant results in large amount of wards placed by each team on that side of the map. If you are trying to push minion waves/farm camps after a Fire Giant fight, realize the enemy almost always has eyes on you and it is a dangerous spot to be in, watch out!

  • During Siege fights, consider split pushing the Mid Phoenix with your Solo Laner. If your Solo Laner decides to tank the Phoenix, your lockdown is very powerful at killing enemy junglers.

Warding


Green = Early/Rotational wards, you don't go out of your way to place these wards. Place them while already in the area, they are used to prevent blind spots while you rotate. They also double as objective wards

Blue = Late game wards, you want to place them as high as possible without getting caught by the enemy doing so. They cut off chokepoints on the enemies side, which lets you know which side of the map they are on. Good wards for a Fire Giant fight

Final Advice

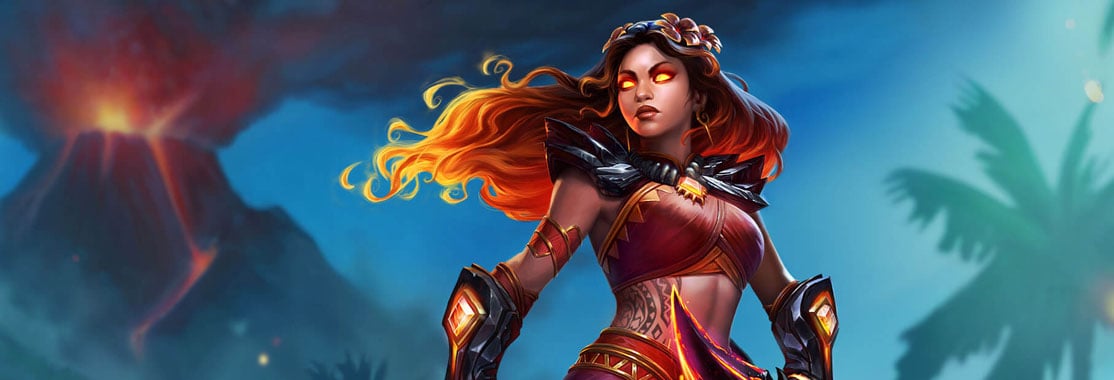
Jungle is difficult, and playing an Early-Game god such as Pele can feel frustrating as messing up early game might feel suffocating to come back from. My best advice is to not give up! You will learn with experience, and the payoff is the stronger you in the future. Don't try and understand the whole guide at once, take what you can out of it and come back later once the specifics become easier to understand.

You got this! <3

Leave a Comment

You need to log in before commenting.

Collapse All Comments

Loading Comments...
Load More Comments

SMITEFire is the place to find the perfect build guide to take your game to the next level. Learn how to play a new god, or fine tune your favorite SMITE gods’s build and strategy.

Copyright © 2019 SMITEFire | All Rights Reserved