Smitefire logo

Join the leading SMITE community.
Create and share God Guides and Builds.

Create an MFN Account


Or

Vote received! Would you like to let the author know their guide helped you and leave them a message?

Banner for Hun Batz guides

Deity/GM Hun Batz Jungle

Jungler Conquest
0 0 1,507
by AutoSpeed updated April 4, 2025

Smite God: Hun Batz

Build Guide Discussion 0 More Guides
Stream is Offline
Tap Mouse over an item or ability icon for detailed info

Hun Batz Build

STARTING ITEMS

Build Item Bumba's Cudgel Bumba's Cudgel
Build Item Axe Axe
Build Item Health Potion Health Potion
3
Build Item Purification Beads Purification Beads

FULL BUILD

Build Item Bumba's Hammer Bumba's Hammer
Build Item Arondight Arondight
Build Item Hydra's Lament Hydra's Lament
Build Item Oath-Sworn Spear Oath-Sworn Spear
Build Item Heartseeker Heartseeker
Build Item The Crusher The Crusher
Build Item Brawler's Ruin Brawler's Ruin
Build Item Purification Beads Purification Beads

Optional Items

Build Item Mantle of Discord Mantle of Discord
Build Item Purification Beads Purification Beads

Introduction

Hey, my name is AutoSpeed and I have been a Grandmaster + 3500 (MMR cap) in Conquest, Joust, and Duel in every recent season. I'm happy to share my knowledge of the game with everyone, and I appreciate any and all feedback!

Here are my channels:

Hun Batz Basics

Hun Batz's Abilities


Passive - Infused Strikes

After using an ability, Hun Batz's next basic attack deals extra damage.

Works well with Hydra's Lament to have hard hitting auto attacks.


Ability 1 - Somersault

Hun Batz jumps, dealing damage at his landing location and slowing enemies hit.

Somersault is used to escape from combat, or aggressively to slow the enemies in the early game.


Ability 2 - Overhand Smash

Hun Batz slams his staff, dealing damage to all enemies in front of him. He is knock up immune while casting this ability.

Overhand Smash is your main damage ability, used to hit jungle camps and gods on cooldown. It has a very low cooldown, so use it frequently.


Ability 3 - Sacred Monkey

Hun Batz throws a monkey through the air, damaging enemies on hit. The monkey then bounces up to 3 times, damaging each new target. He can activate the ability again, causing him to teleport to the next (or final) enemy hit.

Sacred Monkey is used to hit enemies from a distance. It does a large amount of damage if it hits multiple people, and can be used as a gap closer. It's best to use Sacred Monkey to initiate, and Somersault to disengage.


Ultimate - Fear No Evil

Hun Batz summons a totem on the ground, dealing rapid damage and fearing all enemies hit within a giant radius.

Fear No Evil is used to ward of a massive area of a fight, as it does great damage and CC. Use it on cooldown to force enemy relics, try to hit multiple enemies at once with it.


Ability Rotations:

Long Range Poke:

Sacred Monkey > Overhand Smash

Boxing Combo:

Overhand Smash > Auto Attack > Sacred Monkey > Auto Attack Sacred Monkey > Auto Attack

Only teleport to Scared Monkey if it did not bounce!

Ultimate:

Sacred Monkey > Fear No Evil > Auto Attack > Overhand Smash

Blink Ultimate:

Fear No Evil > Sacred Monkey > Auto Attack > Overhand Smash

Hun Batz Jungle Tutorial

Early Game:
  • Star at the Fire Giant side Speed Buff (or Red Buff), and group up the jungle camps with your mid laner. Once the Red and Speed buff jungle camps are cleared together, head towards your remaining speed buff. Your mid laner should help you clear this buff camp. Finally, head towards the exp camp near the Tier 1 Mid tower, presume you will clear this alone.

  • You now have 2 choices. You can stay in the Jungle towards the mid lane, looking for a gank on the enemy mid laner or clear the Mid-Harpies. The second option is to head straight to duo lane, and look for a gank on the enemy duo lane (and clear Scorpion). Heading to Duo lane has a greater risk, but much greater reward if successful.

  • You don't have the strongest ganks during the early game, but still keep the rotation of Buff Camps > Rotations > Harpies. Focus on farming to level 5 as fast as possible, as Fear No Evil is your prized ganking ability.

  • Use Fear No Evil on a person who does not have relics, as the ability has too long of a cooldown in the early game to be used on the same person 2x before their relics come up. However, Fear No Evil is special that it can force relics of 2, possibly 3 people each time it is used. Team fights are your best friend

Mid Game:
  • Begins around ~14 minutes, or when most people have hit Level 12 and unlocked their Second Relic. Most enemy teams have gotten around to warding by now, and team fights become increasingly common. Most builds have started to show effectiveness.

  • Fear No Evil is still devastating to the enemies, but most of them will immune it with Purification Beads or Aegis Amulet. Try to Fear No Evil to get relics once, and save your Blink Rune to Fear No Evil when they have no relics. Usually the enemies will hang back without relics, and Blink Rune helps close that gap.

  • During the team fights, it's also a fine idea to play counter-dive. You can use your abilities to hit enemy frontliners from afar, and use Fear No Evil if they dive your team. Many junglers/supports/solo laners are forced to disengage when you ult them, and many of them don't have relics to even do so. Counter dive is a very powerful strategy as Hun Batz.

Late Game:
  • Almost everybody has hit Level 20, Fire Giant is the most important objective on the map. Starter items become unlocked at Level 20, which results in a damage/defensive spike. This means that everybody dies faster, and Team Fights are the most important thing.

  • You play the fights the exact same as the mid game, except there might be situations where you try to kill someone through their Beads/Aegis combo. Sometimes, your solo laner or support can force relics on their own, which is where Hun Batz truly shines. Fear No Evil works not only as a kill ability, it prevents the enemy team from helping saving their ally as they are also CC'd in the process.

  • During a siege fight, play with your team and try to siege the phoenix as a group. Only Blink Rune on the enemy backline if your solo laner is capable of doing the same and goes in first, use Fear No Evil on the enemy frontline if not.

Warding


Blue - Early/Rotational wards, you don't go out of your way to place these wards. Place them while already in the area, they are used to prevent blind spots while you rotate. They also double as objective wards

Green - Late game wards, you want to place them as high as possible without getting caught by the enemy doing so. They cut off chokepoints on the enemies side, which lets you know which side of the map they are on. Good wards for a Fire Giant fight

If you find yourself at an enemy buff camp, feel free to drop a ward for the timer if you plan on coming back!

It is very important to recognize which side of the map enemies are on. If you see the enemy jungler on the solo side, recognize they could counter-rotate if you try to play on that side of the map. On the flip side, it means you are free to rotate on the Gold-Fury side of the map!

Aspect

The Hun Batz aspect adds more crowd control to your kit by applying a stun to his Overhand Smash ability. However, this comes at the cost of a significant damage reduction on that same ability.

Personally, I’d recommend using this aspect if you're playing Hun Batz in a support role, where utility and setup are more valuable than raw damage. But if you're playing him in the jungle, the trade-off isn't worth it—the damage loss is just too high.

Pros: Provides an additional way to force beads from your opponents, giving you more setup potential.

Cons: Sacrifices too much damage, especially in a role where burst is essential.
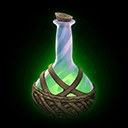
Final Advice

Hun Batz is a nimble jungler who goes about forcing relics. You have a slow start in the early game, but you rapidly gain pressure and have Fear No Evil one of the best team fighting abilities in the game. Play to your strenghts, and go bananas mon!

Leave a Comment

You need to log in before commenting.

Collapse All Comments

Loading Comments...
Load More Comments

SMITEFire is the place to find the perfect build guide to take your game to the next level. Learn how to play a new god, or fine tune your favorite SMITE gods’s build and strategy.

Copyright © 2019 SMITEFire | All Rights Reserved