Smitefire logo

Join the leading SMITE community.
Create and share God Guides and Builds.

Create an MFN Account


Or

It's time for the SMITE 2 Season 0 Guide Contest! Create or update guides during the following 2 weeks to compete for the $2,000 prize pool! 🏆

Vote received! Would you like to let the author know their guide helped you and leave them a message?

Banner for Mordred guides

Master Mordred Solo

21 2 9,611
9.6
by lestimics updated February 18, 2025

Smite God: Mordred

Build Guide Discussion 0 More Guides
Tap Mouse over an item or ability icon for detailed info

Mordred Build

Starter build

Notes Bluestone Pendant It is the most important item for most sololaners, you get power, mana and hp sustain for the lane.

Health Chalice Hp sustain for the lane.

Blink Rune You can teleport a few meters in front of you while you are in combat.

Notes

Bluestone Pendant It is the most important item for most sololaners, you get power, mana and hp sustain for the lane.

Health Chalice Hp sustain for the lane.

Blink Rune You can teleport a few meters in front of you while you are in combat.

Build Item Bluestone Pendant Bluestone Pendant
Build Item Health Chalice Health Chalice
Build Item Health Potion Health Potion
2
Build Item Blink Rune Blink Rune

Full build (Activate Aspect)

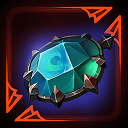
Notes Bluestone Brooch Gives you a lot of power and poke with your skills.

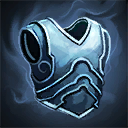
Mystical Mail This item gives you a lots of health, defense and has an offensive effect. The important thing about this item is the aura that deals damage to nearby enemies. Switch Mystical Mail and Screeching Gargoyle for magical solo enemy.

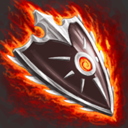
Shield of the Phoenix This item gives you health, defense, CD and his passive restores a little of your life when you hit an enemy god with a skill.

Screeching Gargoyle It is essential vs magical characters for their defense, CD and their passives is a active that can silence the enemy and reduce their defenses.

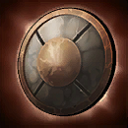
Gladiator's Shield It provides you defensive and offensive attributes thanks to its passive that does extra damage with skills.

Void Shield Mixed item that reduce physical defenses to near enemies.

Soul Reaver It gives you great damage with your skills.

Blink Rune You can teleport a few meters in front of you while you are in combat.

Notes

Bluestone Brooch Gives you a lot of power and poke with your skills.

Mystical Mail This item gives you a lots of health, defense and has an offensive effect. The important thing about this item is the aura that deals damage to nearby enemies. Switch Mystical Mail and Screeching Gargoyle for magical solo enemy.

Shield of the Phoenix This item gives you health, defense, CD and his passive restores a little of your life when you hit an enemy god with a skill.

Screeching Gargoyle It is essential vs magical characters for their defense, CD and their passives is a active that can silence the enemy and reduce their defenses.

Gladiator's Shield It provides you defensive and offensive attributes thanks to its passive that does extra damage with skills.

Void Shield Mixed item that reduce physical defenses to near enemies.

Soul Reaver It gives you great damage with your skills.

Blink Rune You can teleport a few meters in front of you while you are in combat.

Build Item Bluestone Brooch Bluestone Brooch
Build Item Mystical Mail Mystical Mail
Build Item Shield of the Phoenix Shield of the Phoenix

Build Item Screeching Gargoyle Screeching Gargoyle
Build Item Gladiator's Shield Gladiator's Shield
Build Item Void Shield Void Shield
Build Item Soul Reaver Soul Reaver
Build Item Blink Rune Blink Rune

Situational items

Notes Hide of the Nemean Lion right now the carries are very strong and this item gives you a passive that when you activate it you reflect damage, that's why it's very good vs carries. This item you have to replace for the Void Shield

Talisman Of Purification This is necessary when the enemy team has a lot of CC's skills. This item you have to replace for the Screeching Gargoyle

Ruinous Ankh Defensive items that provides anti healing to nearby enemies. This item you have to replace for the Mystical Mail

Notes

Hide of the Nemean Lion right now the carries are very strong and this item gives you a passive that when you activate it you reflect damage, that's why it's very good vs carries. This item you have to replace for the Void Shield

Talisman Of Purification This is necessary when the enemy team has a lot of CC's skills. This item you have to replace for the Screeching Gargoyle

Ruinous Ankh Defensive items that provides anti healing to nearby enemies. This item you have to replace for the Mystical Mail

Build Item Hide of the Nemean Lion Hide of the Nemean Lion
Build Item Talisman Of Purification Talisman Of Purification
Build Item Ruinous Ankh Ruinous Ankh

Mordred's Skill Order

Cruel Strikes

1 X Y
Cruel Strikes
1 4 6 8 10

Bloodrage

2 A B
Bloodrage
3 15 16 18 19

Severing Slice

3 B A
Severing Slice
2 7 11 12 14

Heart Slash

4 Y X
Heart Slash
5 9 13 17 20
Cruel Strikes
1 4 6 8 10

Cruel Strikes

1 X
Strike twice with your swords.
  • First Slash, dealing Physical Damage to enemies in front of you.
  • Then Slam, dealing Physical Damage to enemies in a line and either dealing bonus damage or Healing, based on your Basic Attack Chain.
Slash Damage: 75 / 95 / 115 / 135 / 155
Slash Damage Scaling: 45% Strength
Slam Damage: 85 / 115 / 145 / 175 / 205
Slam Damage Scaling: 65% Strength
Bonus Damage: 45% Protections
Heal: 45% Protections
Minion Heal: 10 / 15 / 20 / 25 / 30
Slash Radius: 4m
Slash Angle: 90 degrees
Slam Range: 4m
Slam Radius: 0.8m
Cooldown: 12 / 11.5 / 11 / 10.5 / 10s
Cost: 45 / 50 / 55 / 60 / 65

Additional Notes:
  • Line attack deals Bonus damage on hit if Mourning is next in the basic attack chain.
  • Line attack Heals you on hit if Clarent is next in the basic attack chain.
  • Lower healing on hitting enemy minions.
Bloodrage
3 15 16 18 19

Bloodrage

2 A
Deal Physical Damage to enemies around you, then gain increased Attack Speed and Movement Speed.
  • While buffed, basic attack hits on enemies reduce their Physical Protections and increase your own.
Damage: 70 / 115 / 160 / 205 / 250
Damage Scaling: 60% Strength + 40% Intelligence
Attack Speed: 40%
Movement Speed: 12 / 14 / 16 / 18 / 20%
Protections: 4 / 5 / 6 / 7 / 8
Buff Duration: 4 / 4.5 / 5 / 5.5 / 6s
Protection Reduced: -4 / -5 / -6 / -7 / -8
Debuff Duration: 4 / 4.5 / 5 / 5.5 / 6s
Attack Speed: 40%
Radius: 3.2m
Cooldown: 14s
Cost: 50 / 55 / 60 / 65 / 70

Additional Notes:
  • Physical Protection buff and debuff stacks up to 4 times.
Severing Slice
2 7 11 12 14

Severing Slice

3 B
Fire a projectile that deals Physical Damage and Slows enemies.
  • Direct hits with the center of the projectile cause targets to Bleed, taking Bonus Physical Damage as they move.
Damage: 55 / 85 / 115 / 145 / 175
Damage Scaling: 50% Intelligence
Bleed Damage: 25 / 30 / 35 / 40 / 45
Bleed Damage Scaling: 12% Strength
Minion Damage: 15 / 20 / 25 / 30 / 35
Minion Damage Scaling: 5% Strength
Slow: 30%
Debuff Duration: 2.5s
Bleed Damage Scaling: 12% Strength
Range: 9.6m
Radius: 0.6m
Inner Radius: 0.2m
Cooldown: 12s
Cost: 40 / 50 / 60 / 70 / 80

Additional Notes:
  • Enemy gods are damaged for every 1.25m they move.
  • Minions take damage over time instead of due to movement.
Heart Slash
5 9 13 17 20

Heart Slash

4 Y
Deal Physical Damage to enemies in an area in front of you. If you hit an enemy god, they are Rooted. You then Channel to siphon their lifeforce, gaining a Health Shield and Healing over time while dealing Physical Damage repeatedly to that enemy.

Damage: 100 / 155 / 210 / 265 / 320
Damage Scaling: 75% Strength
Damage Per Tick: 30 / 40 / 50 / 60 / 70
Damage Scaling Per Tick: 25% Intelligence
Heal: 10 / 20 / 30 / 40 / 50
Heal Scaling: 20% Intelligence
Shield Health: 160 / 200 / 240 / 280 / 320
Range: 6m
Radius: 1m
Cooldown: 20s
Cost: 40

Additional Notes:
  • Ability repeatedly deals damage every 0.3s. over 1.5 seconds.
  • You are Slowed while Channeling.

Mordred Threats

Tap each threat level to view Mordred’s threats

Max
0
Major
0
Even
1
Minor
1
Tiny
0

Mordred Synergies

Tap each synergy level to view Mordred’s synergies

Ideal
0
Strong
1
OK
1
Low
0
None
0

Introduction

Hi, this guide is brought to you by lestimics. I started playing Smite 1 on PC in 2014. I've been playing competitively since 2020 and have been a professional Smite player from 2021 to 2023. I've played on different teams like JustF6, Gilded Gladiators or Tartarus Titans.

You can check out the SmiteVOD YouTube channel where my recorded professional games are. I've peaked at 3500 MMR GrandMaster/Masters in Ranked Conquest on the PC platform every season since 2018. I've also done Smite Masters (LAN) 4 times in 2022, so I really think I have the knowledge to guide on the Solo role in SMITE 2.

I hope you find this guide as a useful learning resource for playing Mordred as Solo.

Here are my socials:

Abilities

Mordred's Abilities


Passive - Wrath Of The Forsaken

If you hit enemies you get rage, with this rage you can use 2 types of Heart Slash.

The first Heart Slash needs 40 rage and has to reach at least the first bar.

The second Heart Slash needs 80 rage and has to reach at least the second bar.

Also if you use a skill or do a basic attack, you have a mini dash that knocks you up and does damage, to use this dash press (Space).

However if you activate the aspect, you can use the dash every time you do a skill, but it no longer knocks you up.


Ability 1 - Cruel Strikes

Mordred strikes twice with his swords: the first one swings his sword in a wide arc, dealing physical damage to all enemies in front of him and the next one its the same but with more front range.

If you hit a basic before casting this skill you heal with it and deal less damage.

It is the best ability that Mordred has because of the damage and the ease it gives you to push minions.


Ability 2 - Bloodrage

Deals physical damage around you in a circle, and you also gain movement speed and attack speed.

If you basic hit with this buff, you reduce the physical defense of your enemies and you gain them instead.

This skill is great for chasing enemies and getting close to them thanks to the movement speed.


Ability 3 - Severing Slice

Severing Slice fires a projectile that deals damage and slows enemies. If you hit enemies with the middle, they will also bleed.

This skill is very important in Late Game because we have a build that does a lot of damage with your skills, you will be able to poke from afar easily.


Ultimate - Heart Slash

This ability is combined with the passive as I explained before.

The first Heart Slash is a forward line that if you hit an enemy it does damage, you get a shield and recover a part of your health.

The second Heart Slash turns you CC's immune and charges Mordred forward, traveling through walls, stopping on the first enemy god hit. If you hit an enemy you launch yourself and the stunned target into the sky, dealing a lot of damage.

This ultimate is very good because it has no CD, you only need rage which is obtained very easily, this way you can spam the ultimate repeatedly


Example Combos:

Severing Slice (From the distance) to pokes the enemies > press Space for get closer to enemy > Severing Slice > press Space > Cruel Strikes

Heart Slash > Severing Slice > press Space > Cruel Strikes > Severing Slice

How to play Mordred

Gameplay Start / Early Game
  • Start at the Fire Giant side in the lane. You have to push as fast as possible so you kill the archer minions fast using your Cruel Strikes and your Space, with only that you kill all the archers, then push the melee minions with basic attacks and your next Cruel Strikes.

  • It's important to know that Mordred has a really good early game so you can fight to the other solo laner easily.

  • When you have pushed the first wave, you have to do your blue buff and get your lvl 2, then you can upgrade your Severing Slice.

  • The following moves are push the lane and try to win the Totem (Totem gives gold for all the team and mana regeneration). From this point on you have to try to win the pressure of the lane to be able to kill the side camps and get more gold and experience.

  • On the side camps you can kill the gold camp which doesn't give you experience but a lot of gold, and the two harpy camps give gold and experience. Also if you have pressure online you can invade their harpies too.

  • Remember to buy wards to avoid the ganks and try to comunicate to the jungle to invade blue buffs or try to kill the solo laner.

Mid Game:
  • At this point of the game, which is roughly between 10:00 and 20:00 minutes, you have to push the lanes as quickly as possible and try to rotate, either by using the teleports of the sides of the lane for the duo lane or rotating to the mid lane.

  • If you do mid lane rotations, Mordred is a very good character for this type of situations thanks to his ultimate Heart Slash since you can quickly gank the enemy mid lane, if you manage to kill him or get enough pressure, you can get to do the Gold Fury or the Pyromancer.

  • If you use the teleporter from the solo to the duo lane, you have to do the same play but trying to kill the carry or the support and gain the pressure to be able to do the Gold Fury.

Late Game:
  • At this point in the game your job is to be the frontline with the support as teamfights start around the fire giant at around minute 25:00.

  • You have to harass, poke and kill the enemy carry, mid and jungler as they are the most dangerous for your team.

  • To deal with this type of situation you have to take advantage of the Severing Slice ability as the damage you can do is insane and you can do a good engage using your ultimate Heart Slash.

  • The moment you have the fire giant buff, the sieges on the Phoenix begin. Here you have to continue taking advantage of your potential to poke the enemy gods and destroy the Phoenix with the help of your carry and mid. You can also go with your jungle to another Phoenix to create pressure since you have a lot of defense to tank and your jungle can do good damage to the Phoenix easily, adding to the fact that you have a very good fight.

  • If the enemy has the fire giant and it is your turn to defend the Phoenix, you have to be in a group with your team and defend under the Phoenix, being careful with the picks.

  • Constantly call for all information, when you engage try to be followed by your team, always be sure of your decision making.

  • Remember to wards all the zone on fire giant and when you are sieging you need wards too.

How to ward as Solo

White circles: Vision Ward
Green circles: Sentry Ward

Early/Mid Game

Here you can see the best spots to ward as a Sololaner.

These wards will help you to know where the enemy sololaner is moving, as well as if the jungler is trying to gank you.


High Pressure Game

These wards are when you have a lot of pressure in lane and you want to invade blue buffs and red buffs. Remember to call your team that you want to invade so they can help you.


Late Game

These wards are for fire giant teamfights. Remember that you can only have 2 wards active at the same time, so you will need help from your team to ward the entire area from the fire giant.


Siege/Defense Phoenix

These wards are very important when it comes to sieges and defending phoenixes. In this case, the wards are the same whether you defend or attack.
This wards are important because mages often cast abilities through walls, you will be able to react better to their abilities.

Leave a Comment

You need to log in before commenting.

Collapse All Comments

Loading Comments...
Load More Comments

SMITEFire is the place to find the perfect build guide to take your game to the next level. Learn how to play a new god, or fine tune your favorite SMITE gods’s build and strategy.

Copyright © 2019 SMITEFire | All Rights Reserved