
Vote received! Would you like to let the author know their guide helped you and leave them a message?


![]() Vampiric Shroud If you hit n enemy heals you 3 health and 4 mana, once per target per ability.
Vampiric Shroud If you hit n enemy heals you 3 health and 4 mana, once per target per ability.
![]() Health Chalice HP sustain for the lane.
Health Chalice HP sustain for the lane.
![]() Sundering Arc You deal damage in a cone to enemy gods and jungle monsters, allowing you to buff faster and secure them easily.
Sundering Arc You deal damage in a cone to enemy gods and jungle monsters, allowing you to buff faster and secure them easily.
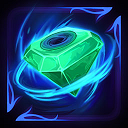
![]() Bifrost Shard gives you a free ward that lasts 90 seconds. It is useful for early ganks from the enemy jungler.
Bifrost Shard gives you a free ward that lasts 90 seconds. It is useful for early ganks from the enemy jungler.
 Vampiric Shroud
 Health Chalice
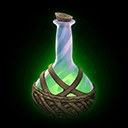 Health Potion
 Bifrost Shard
 Sundering Arc
![]() Blood-Soaked Shroud if you hit an enemy it heals you 0.5% health and 1% mana but against enemy gods it heals you 1% health and 2% mana, once per target per ability.
Blood-Soaked Shroud if you hit an enemy it heals you 0.5% health and 1% mana but against enemy gods it heals you 1% health and 2% mana, once per target per ability.
![]() Gem of Focus gives you a lot of cooldown and intelligence in addition to its passive that increases your movement speed when you use abilities.
Gem of Focus gives you a lot of cooldown and intelligence in addition to its passive that increases your movement speed when you use abilities.
![]() Genji's Guard gives you magical defenses and cooldown reduction and its passive makes that when you receive damage your abilities get 3 seconds less cooldown reduction. Switch
Genji's Guard gives you magical defenses and cooldown reduction and its passive makes that when you receive damage your abilities get 3 seconds less cooldown reduction. Switch ![]() Genji's Guard and
Genji's Guard and ![]() Shield of the Phoenix against physical solo enemy.
Shield of the Phoenix against physical solo enemy.
![]() Shield of the Phoenix gives you health, defense, CD and his passive restores a little of your life when you hit an enemy god with a skill.
Shield of the Phoenix gives you health, defense, CD and his passive restores a little of your life when you hit an enemy god with a skill.
![]() Breastplate of Valor gives you physical defenses and cooldown reduction.
Breastplate of Valor gives you physical defenses and cooldown reduction.
![]() Heartwood Charm gives you a lot of health and cooldown reduction, in addition to its passive that gives you 20% more cooldown reduction to your healing abilities, and its active makes your next healing ability have no cooldown reduction doing 50% less damage (not ultimate).
Heartwood Charm gives you a lot of health and cooldown reduction, in addition to its passive that gives you 20% more cooldown reduction to your healing abilities, and its active makes your next healing ability have no cooldown reduction doing 50% less damage (not ultimate).
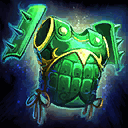
![]() Hide of the Nemean Lion right now the carries are very strong and this item gives you a passive that when you activate it you reflect damage, that's why it's very good vs carries.
Hide of the Nemean Lion right now the carries are very strong and this item gives you a passive that when you activate it you reflect damage, that's why it's very good vs carries.
![]() Sundering Arc You deal damage in a cone to enemy gods and jungle monsters, allowing you to buff faster and secure them easily.
Sundering Arc You deal damage in a cone to enemy gods and jungle monsters, allowing you to buff faster and secure them easily.
![]() Bifrost Shard gives you a free ward that lasts 90 seconds. It is useful for early ganks from the enemy jungler.
Bifrost Shard gives you a free ward that lasts 90 seconds. It is useful for early ganks from the enemy jungler.
 Blood-Soaked Shroud
 Gem of Focus
 Genji's Guard
 Shield of the Phoenix
 Breastplate of Valor
 Heartwood Charm
 Hide of the Nemean Lion
Bifrost Shard
Sundering Arc
Hide of the Nemean Lion
Bifrost Shard
Sundering Arc
![]() Spectral Armor should only be purchased if the enemy carry has critical items.
Spectral Armor should only be purchased if the enemy carry has critical items.
 Spectral Armor

 Y
Y
 B
B
 A
A
 X
X

Tap each threat level to view Ra’s threats
Tap each synergy level to view Ra’s synergies
Hi, this guide is brought to you by lestimics. I started playing Smite 1 on PC in 2014. I've been playing competitively since 2020 and have been a professional Smite player from 2021 to 2023. I've played on different teams like JustF6, Gilded Gladiators or Tartarus Titans.
You can check out the SmiteVOD YouTube channel where my recorded professional games are. I've peaked at 3500 MMR GrandMaster/Masters in Ranked Conquest on the PC platform every season since 2018. I've also done Smite Masters (LAN) 4 times in 2022, so I really think I have the knowledge to guide on the Solo role in SMITE 2.
I hope you find this guide as a useful learning resource for playing ![]() Ra as Solo.
Ra as Solo.
Here are my socials:
|
Passive -
Ra's passive is basic but it is very good because it gives you movement speed for each ability you use up to a maximum of 3. It is important to have this passive active constantly, although be careful not to waste too much mana. |
|
Ability 1 -
It's It's important to use your |
|
Ability 2 -
This ability deals area damage around you and applies a slow, and enemies that look at you gain additional slow and are blinded. While using this ability your basic attacks go through enemies dealing magic damage, this helps you to push minions better. |
|
Ability 3 -
The light empowers you and allied gods in the area, granting strength, intelligence, physical protection and magical protection. |
|
Ultimate -
A straight line beam with a long range that deals magic damage to enemies. Also if you have the aspect active as I mentioned before it also heals allies hitting them with the This ability is very good for securing or stealing objectives like Fire Giant and Gold Fury. |
SMITEFire is the place to find the perfect build guide to take your game to the next level. Learn how to play a new god, or fine tune your favorite SMITE gods’s build and strategy.
Copyright © 2019 SMITEFire | All Rights Reserved


At max level it lasts 2>4 seconds and lowers the cooldown by 2 seconds which makes more damage early(and later) than Celestial Beam whether on a int or defensive build.
Celestial Beam also only gets damage.
In the scenario of 0 int like here(minus the solar blessing) - Divine Light will deal 325 damage compared to 250 + 50 per ray, so 450 damage at 1.0 attackspeed(You will have more, so it is closer to 500) plus auto attack damage on each targer on top of that, which outdamages by a lot.
Rays will also proc the bluestone and glad shield as if it is a separate ability.
For that reason a berserker shield is a choice that will give You more defense and damage on lower HP, while not being too different damage wise on full HP from glad shield vs attackspeed and higher phys+magical def.
You would lose on cooldown and some HP, though, so no idea which will actualy be better.
I'd call it a matter of preference.
Divine light has much higher boxing and clearing potential than his Celestial beam because of that, which is a great help early game and helps win the pressure.
When Ra was put into solo mode it was true that the best ability was Divine Light, but in the patch notes 2 weeks ago they nerfed the damage of the 2nd one a lot. Now you have to level up Celestial Beam because of that.
You can play it as you mentioned with the Berserker shield, but in my opinion it's worse.
https://www.smite2.com/news/open-beta-2-update-notes/
Thanks for your comment
Really quick notification, it looks like the video for
Also, something to consider (your choice), but indicating in the title that this is a build specifically for Solo could be easier and quicker for readers to reference, rather than going down into the body of the guide to confirm.
Thanks for reporting the error and the feedback, it's now fixed.
I hope the guide was helpful to you.