

This guide has not yet been updated for the current season. Please keep this in mind while reading. You can see the most recently updated guides on the browse guides page
This build has been archived by the author. They are no longer supporting nor updating this build and it may have become outdated. As such, voting and commenting have been disabled and it no longer appears in regular search results. We recommend you check out our other Artemis Builds
Vote received! Would you like to let the author know their guide helped you and leave them a message?
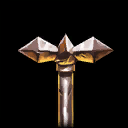 Charged Morningstar
 Boots
Boots
 Purification Beads
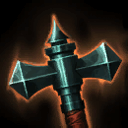 Transcendence
 Ninja Tabi
 Qin's Sais
 Bloodforge
 Asi
Asi
 Deathbringer
 Malice
 Demon Blade
 Bulwark of Hope
 Breastplate of Valor
 Magi's Cloak
 Spirit Robe
 Healing Potion
 Mana Potion
 Purification Beads
 Aegis Amulet
 Ward
Ward
 Sentry Ward
 Heavenly Wings
 Cursed Ankh
 Titan's Bane
 Jotunn's Wrath
 Transcendence
 Ninja Tabi
 Qin's Sais
 Asi
Asi
 Deathbringer
 Titan's Bane
 Hello fellow SMITE players! This is a guide to help you all build and play
 ![]() Artemis.
Artemis. ![]() Artemis is by far my most loved godess in the game. I find her playstyle very enjoyable and she's a capable and strong godess.
Artemis is by far my most loved godess in the game. I find her playstyle very enjoyable and she's a capable and strong godess.
![]() Artemis was my first ever Diamond godess. I don't claim to be the best at her, but I do have a lot of experience with her and I do well with her in most of my games and carry the team, like you should... most of the time.
Artemis was my first ever Diamond godess. I don't claim to be the best at her, but I do have a lot of experience with her and I do well with her in most of my games and carry the team, like you should... most of the time.


![]() Artemis is a strong godess. Unfortunately the "easy" part about her only shows at the very late game. During early and mid game,
Artemis is a strong godess. Unfortunately the "easy" part about her only shows at the very late game. During early and mid game, ![]() Artemis is rather weak and, let's face it, worse than other hunters. That does not make her any less lovable, let's see what you need to do and when you need to do it!
Artemis is rather weak and, let's face it, worse than other hunters. That does not make her any less lovable, let's see what you need to do and when you need to do it!

Early game:
The early game is by far the hardest. You'll find yourself needing to return to base quite frequently due to health or mana shortage.
The mana problems are quickly solved by building ![]() Transcendence, but health will still be a problem, and
Transcendence, but health will still be a problem, and ![]() Artemis has no (real) escape either.
Artemis has no (real) escape either.
Here are a few tips to not die:
#1: Stay behind your teammates, but not all the way at the back either.
-> Remember how everybody says: "Hunters are supposed to be at the backline, because they're so squishy." Well, wrong!
Now, I'm not saying you should be standing all the way at the front or heck, even at the enemy tower, defenitely not, you need to be in the middle.
You may ask: "Why?"
Simple, really. Let's explain this in points, to make it more visible and understandable:
-Front: If you're found out in front of your team, you're going to get hit. Alot. You'll then get CC'd, hit, and die.
-Back: The back isn't safe either. If the enemy assassin comes around and finds you behind your team, you're an easy kill. We all know that ![]() Loki that killed you 10 times because he found you all alone behind your team.
Loki that killed you 10 times because he found you all alone behind your team.
#2: Never stay in the jungle to long. The only times you should be found in the jungle is:
- Grabbing damage or mana buff.
- Quick XP camp clear.
Attempt to never be alone while in the jungle. If the enemy assassin catches you, you're most likely dead.
#3: Never over-extend. Do not go further than half the lane, ever. Unless you're pushing lane, there's no reason for you to be there. Why?
If the enemy jungler (or anybody else, really) ganks you at that point, it's game-over. ![]() Artemis has no escape, so if you're caught half the lane, you're a goner. Heck, even 1/4th of the lane is allready to far.
Artemis has no escape, so if you're caught half the lane, you're a goner. Heck, even 1/4th of the lane is allready to far.
#4: Allways place wards.

Mid game:
At this point, you'll start to become stronger. You'll be able to survive on your own, so your support can go and help others now.
However, do not forget about the points for the early game. You're still fairly weak compared to others, so keep those in mind.
Here are the things you'll need to know for mid-game:
#1: You can enter the jungle for longer periods of time now. However, do take care not to hang around. It's a good idea to place Sentry wards while you're here. You may happen to find an enemy ward, which if you destroy it, can save lives.
#2: Now this isn't only for you, this is for the entire team, but should nobody on your team do it: Start warding Fire Giant and Gold Fury. Not only will you be able to sneak up on enemies and kill them, you'll also be able to know when an enemy tries to get this objective, and counter it.

Late game:
This is probably what you're really excited about. And for good reason. The late game is where ![]() Artemis shines and is by far the most dangerous hunter. She can melt enemies in an instant, from mages to even some tanks.
Artemis shines and is by far the most dangerous hunter. She can melt enemies in an instant, from mages to even some tanks.
However, do keep in mind that this does not mean you're going to get Godlikes through the roof, or be invincible.
There are still a few things to keep in mind. They are the following:
#1: Do not over-extend. Again, the same thing as early and mid game. If you're caught somewhere you shouldn't be, the entire enemy team can jump you. If you're either:
- Lucky
- Very Skilled
- Or your enemy is stupid
you'll get out alive. Otherwise, you're most likely dead.
#2: Do not attempt to solo. You should allways be in close proximity of teammates. Sure, it's annoying when they "steal" a kill from you, but it's better that they're nearby to help you, should you get in trouble, than them not being nearby when you get in trouble.
Also do not attempt to solo Fire Giant or Gold Fury. Believe it or not, it's possible to solo these 2 as ![]() Artemis alone. But if the enemy finds you while doing it...
Artemis alone. But if the enemy finds you while doing it...
#3: Keep warding.

Wards
Now that we've got that out of the way, let's show exactly where you should ward, as ![]() Artemis.
Artemis.
Note: to ward, you'll need to buy ![]() Ward or
Ward or ![]() Sentry Ward first, obviously.
Sentry Ward first, obviously.
 Warding map

The items are probably what you really came for, right? Come on, I know it is, don't be so shy! :P
As far as items go, you want to build these things:
- Attack speed items
- Physical Power items
- Crit chance items
- Mana items
- Penetration items
Alternatively, you can also build the following, if necessary:
- Defense items
- Health items
- Cooldown items
- Regeneration items
The recommended items can be found atop the guide. Now, you probably want to know:
"But xZeroStrike, why do we build these items and not just paste some random things there?
Well, Timmy, if you really want to paste random items there, go ahead, maybe you'll come up with something usefull, but here, I'll be explaining why to build these items!

 -
- ![]() Transcendence
Transcendence
Categories: Mana, Physical power, MP5
![]() Transcendence, the item that looks like this:
Transcendence, the item that looks like this:
 , is BY FAR the most necessary item on
 ![]() Artemis.
Artemis.
Without it, you'll run out of mana quicker that you can say:
"Johnboy, get the beer out of the freezer and let's get the party started!"
![]() Transcendence doesn't only give you flat mana increase, it'll also gain stacks, which will hold other benefits:
Transcendence doesn't only give you flat mana increase, it'll also gain stacks, which will hold other benefits:
15 mana / stack gained, with a max. of 50 stacks.
- God kill: rewards 5 stacks. 10 kills will max out your stacks.
- Minion kill: 1 stack. 50 kills will max out your stacks.
Not only that, but 3% of your mana (!!), is converted to physical power!
With the Mana also comes Physical power, resulting in harder hits, and also MP5, which will make your Mana regenerate faster!
To summarize ![]() Transcendence:
Transcendence:
35 Physical power
300 Mana
6 MP5
Conclusion: You NEED this item!

 -
- ![]() Ninja Tabi
Ninja Tabi
Categories: Physical power, Attack speed, Movement speed.
The ![]() Ninja Tabi is
Ninja Tabi is ![]() Artemis' go to boots. As
Artemis' go to boots. As ![]() Artemis, you'll want to make most out of your
Artemis, you'll want to make most out of your ![]() Vengeful Assault, but you need attack speed for that skill to actually do something. Thus you pick
Vengeful Assault, but you need attack speed for that skill to actually do something. Thus you pick ![]() Ninja Tabi over
Ninja Tabi over ![]() Warrior Tabi
Warrior Tabi
![]() Ninja Tabi gives, ontop of the attack speed:
Ninja Tabi gives, ontop of the attack speed:
Movement speed, ... Hold it right there! Isn't that the point of boots? Then why did I.. nevermind, carry on! ... so you'll run faster! Ya..y!
And also some physical power!, and now mana aswell! Hallelujah!
To summarize ![]() Ninja Tabi:
Ninja Tabi:
20 Physical power.
20% Attack speed.
18% Movement speed.
+100 mana
Conclusion: You'll want to get ![]() Ninja Tabi!
Ninja Tabi!

 Tired of reading for a sec? Open this one!
 -
-  Our customer reviews in here!
 Math's presentation. I mean, mathematical
 -
-  -
-
 |
This item gives: Physical power. Lifesteal. The physical power lets you do more damage, and while you are hitting enemies, you'll also steal their life, mwuha.. sorry. You'll be restoring your own HP. How cool is that?! Now Whenever you kill an enemy (god), you get a shield. The shield has 200 hp + 10 hp per level. So if you're level 20 that's another 200 totalling a 400 HP shield! While the shield is active, you'll also get 10% movement speed, allowing you to escape easier after you've killed somebody and the other 4 enemies are now chasing you trying to get dat booty. |
|
This item gives: Physical penetration. Attack speed. Lifesteal. However, since Now, that doesn't make this item useless. It still has Flat penetration, allowing you to ignore some defenses of your enemy and do more damage this way, and it also has Lifesteal. This item also has a passive, which simply gives you increased lifesteal for 5 seconds when you drop below 35% health, so if you get in a bit of a pickle this item is there to help you climb back out of it. That is, ofcourse, if you aren't dead by the time you get to use it... |

|

 Tired of reading again? More pictures here!
 -
- 
 |
|

 -
- 
 -
-  -
-
 |
Seriously, read it. ... I'm serious it's right there... Okay you lazy punk, the passive on So to say that in English for you: No matter how much defenses your enemy has, you'll allways neglect 33% of this. So the more defense your enemy has, the stronger this item is!. |
|
Now there are times when the enemy tanks aren't there, they took vacation, and instead you have a warrior with just Only 1 defense item. So, you could buy Again, the choice between these 2 comes down to the situation. If the enemy tanks are that bad that your crits even don't do anything, If there are "light" tanks (aka 1 defense item or something), |

|


You may be wondering: Why place relics seperate from items, since they're sort of the same thing?
They're not. Relics are, in my opinion, different than items. While items are there to enhance your character's strenghts, relics are used not to enhance your strenghts, but as a last effort to save you or your teammates' lives. Well, most of them, anyway.
A relic may look usefull. For example, when you look at Sanctuary, you'll think: "OMG, 2s immunity to EVERYTHING?".
This will, obviously, look amazing to you. It's not, unless used in the right situations. Here, I'll try to explain best when and how to use these, and hopefully save you a few deaths.
|
Recommended relics
| |
|
Purification
Purification |
Purification is probably the most common relic you'll see in SMITE. For good reason. The relic grants the player CC immunity for 2s. This will allow you to escape those heavy CC nukes your enemy throws at you. As |
|
Sanctuary
Sanctuary |
Perhaps another relic you'll see pretty much every game, Sanctuary can be an absolute Lifesaver. When you're getting beaten to death and need a quick vacation, you can start running. Your enemy obviously won't let you get away that easily. If you're about to die, use Sanctuary and get out of there. It's recommended you use this only when near "safe zones", such as towers, because this relic runs out pretty fast and after that you can still be killed. Warning:This relic does not make you CC immune. The enemy can still CC you while this relic is active and kill you afterwards, be careful! |
|
Situational Relics
| |
|
Sprint
Sprint |
Sprint is a nice relic to have. It is, however, situational. This in the way that you'll need to see if any of your teammates allready have sprint, preferably your support. If this is the case, you don't need to get this relic, as it is activated in a radius, thus affecting teammates aswell. Incase you do get it, here's when to use it, it's fairly simple: When you need to run. You're low on health? Pop sprint, and run back to a safe zone. |
|
Curse
Curse |
Curse is situational in the same way that Sprint is. If an ally has it, don't bother grabbing it. Curse can be used to escape danger somewhat effectively, but also catch up to an enemy. You can use this relic to slow enemies, as to create some distance between you and the enemy when you're escaping, or to catch up with the enemy when they're trying to escape. |
| Note: You'll need to be careful when using these relics. Relics have long Cooldowns, so using one at the wrong time will waste it and render them useless for a long time, and if they're down when you need them... |
A huge thank you to Smitefire user Papa murmz. It's thanks to him you're seeing this beautiful table! Check out his |

Now, if it's not the items you came for, then what is it? ... Wait! Is it? No... no.. nooooooooh! Impossi.. Oh, he's here for the skills and not to kidnap me for my amazing guide creation skills? Whew! Okay, let's get into the skills section, then!

|
PASSIVE - |

|
ABILITY 1 - |
 Youtube video
|
ABILITY 2 - |
 Ability video
|
ABILITY 3 - |
 ability video
|
ABILITY 4 - |
 ability video

This will conclude the end of the guide!
Let's quickly summarize what we've talked about in this guide. This guide is focused on ![]() Artemis solely, and not gameplay in general. If you want to learn more about that you'll need to find another guide.
Artemis solely, and not gameplay in general. If you want to learn more about that you'll need to find another guide.
These are the points we've talked about:
- Pros / Cons of ![]() Artemis
Artemis
-> Found in the Pros / Cons chapter.
- The items you should build on ![]() Artemis
Artemis
-> Found in the Items chapter.
- The Relics you should get and how to use them.
-> Found in the Relics chapter.
- ![]() Artemis' abilities.
Artemis' abilities.
- How to use ![]() Artemis' abilities.
Artemis' abilities.
-> Found in the Abilities chapter.


 Changelog, for those interested
 Future plans, for those interested
SMITEFire is the place to find the perfect build guide to take your game to the next level. Learn how to play a new god, or fine tune your favorite SMITE gods’s build and strategy.
Copyright © 2019 SMITEFire | All Rights Reserved
The BBCoding is good, but my eyes actually does hurt from reading a bit. Maybe more spaces between the between the borders so everything doesnt look so crunched up. Nice pictures but that Intervention of Pictures should be put in a spoiler for users who just want to see the guide.
P.S. - I dont know if that
I will put a mark there saying it's expensive, though.
Sprint While I see where you're coming from, this item is in my opinion a great item, though you could indeed say it is "situational".
The reason being that even if somebody has sprint, that doesn't mean they'll be near you all the time, unless they're playing a supporting role. If you get ganked at this point, and you have, say sanctuary, you can use that, but once it runs out you'll be nothing faster than your enemy unless you use your
I'll switch this one up -> Sanctuary becomes relic replacement, Sprint will become a situational item.
Borders - I'll add some more spacing, and place the pictures in a spoiler. My bad c:
And I'll then remove that ... fanart c: